How to create retro 3d graphics with blender and gimp
Blender: Free Program to Create 3D Graphics and Render Effects
Normally when we talk about creating images we usually refer to programs such as Photoshop or GIMP, for bitmap graphics, or Inkscape for vector graphics. However, there are also other much more advanced programs that can allow us to even create complex 3D graphics and models, such as Blender.
Blender main features
Undoubtedly, the main feature of this program is that it is a completely free software (even for business use), open source and multi-platform. Any user who wants to use it can use it regardless of its purpose.
Although it is not a particularly simple program to use, it comes standard with a wide variety of primitive geometric figures, including curves, meshes, gaps and metaballs. This will save a lot of work when working with the program. It also has dynamic simulations for soft bodies, particles and fluids, as well as a system of static particles to simulate hair and hair.
The Blender interface is very simple to understand and, in addition, fully customizable. Thus, each user can customize it according to their tastes and their needs.
Blender has a wide variety of animation tools, such as reverse kinematics, deformations, load vertices and static and dynamic particles. It is also designed for game development (their creations get along very well with the Unity engine), so we find collision detection tools and dynamic and logical recreation systems.
This software is compatible with the Python programming language. With it we can automate or control various editing tasks. In addition, the included 3D game engine can be programmed using this language as well.
When rendering, this program has several systems. For example, we can highlight its versatile internal rendering system, as well as the integration with powerful ray tracer systems, or “raytracer”, free as kerkythea, YafRay or Yafrid.
Uses for Blender at home
And if we want to learn to master Blender we can do it. Whenever we have time and a lot of willpower, since, we repeat, it is not a simple program and hides thousands of tools and possibilities.
Formats compatible with Blender
This program has its own file format used to save all projects (.blend). However, it also has a wide variety of compatible formats, both in 2D and 3D.
We can also use Blender together with GIMP to create animated GIF images.
Supported 3D formats to import and export projects:
Also, through certain scripts, it is possible to export projects to other formats that are not officially supported.
Download Blender
Blender is a completely free and open source software. To download it, all we have to do is access the following link where we will find the version corresponding to our operating system. In the case of Windows, in addition, we can download a portable version to be able to use it without installing it on the hard disk.
Minimum requirements
Despite being a fairly complex program, the minimum requirements to use this software are not very crazy. What we must accomplish, at a minimum, is:
Of course, we must bear in mind that 3D rendering and processing consume a lot of resources. Especially CPU, RAM and graphics. Therefore, it is advisable to have at least 8 GB of RAM, a 4-core and 64-bit processor and a powerful new generation graphics card with 1 GB of graphics memory capable of processing the graphics as quickly as possible.
How to create 3-D logos from flat images using GIMP and Blender
Creating a three-dimensional version of a logo or corporate image can be a rather complicated endeavor, but we’re going to show you how. First of all, although there are countless paid design tools out there, you can always turn to free software to do projects like this one. In this case, we’re going to learn how to make 3-D logos from flat images using two well-known freeware programs: GIMP and Blender.
Preparing the flat image in GIMP
The first thing we’ll need is the image that we’re going to use as our base. The only requirement for it is that a single color must predominate, which can be done easily using the crop and paint bucket tools in GIMP or any other 2-D image editor that you like to use. In this case, we’ve used the Uptodown logo and painted it completely black. It doesn’t matter if the background is transparent or not (you’ll see why here in a second).
The next step in GIMP is to export a vector image from the logo so we can import it later into the 3-D editor Blender. To do this, once we’ve opened the image, we’ll have to click on the Select by color button, located on the upper part of the icon grid in the toolbox. Next we’ll left-click inside the logo to select the entire solid area. If the logo is formed by several different parts that aren’t connected to each other, we’ll have to hold down Shift and select the rest of the pieces as well.
Extracting the flat image in Blender
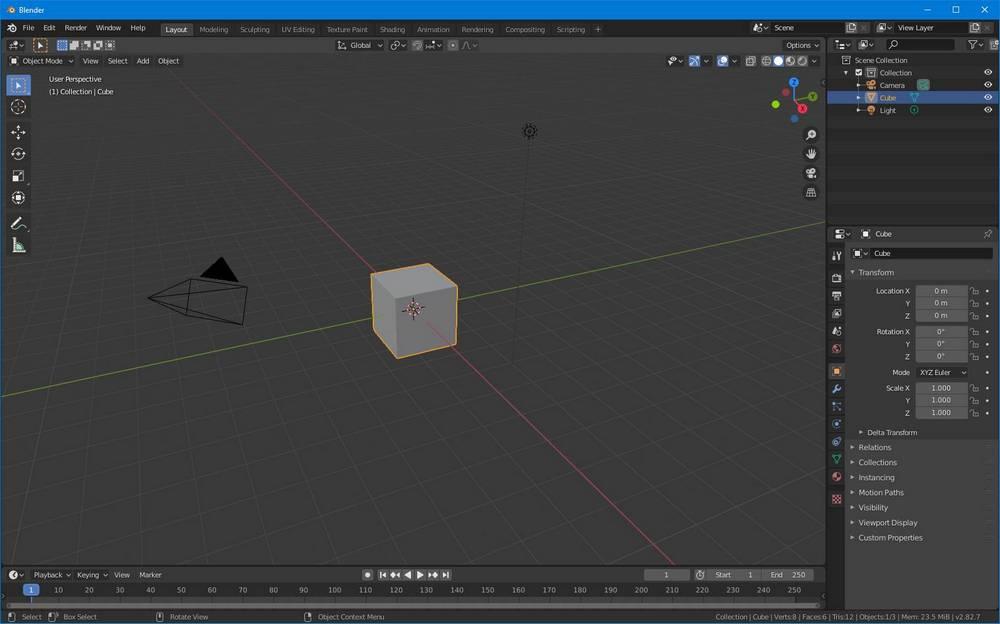
So we’re finished with GIMP and now it’s time to work with Blender. The well-known 3D modelling and editing tool is enormously comprehensive, but we’re going to try to be as concise as possible in this first lesson. When we open it for the first time, we’ll see in front of us a sample project with a three-dimensional cube in the center of the screen. To delete it, we’ll click to select it and then press the X key on our keyboard.
To add the vector image we’ve created to our screen, we click File > Import > .SVG Image and navigate to where we’ve saved our image. Then we’ll see a very small version of our image in the preview window. To expand it, we’ll edit the scale of the object itself. To do so, we’ll search in the right toolbar for the Object panel, represented by a small 3-D orange cube. Here we’ll also find the Scale tool next to the rotate button, as well as the object’s position and the three constraint axes we can transform. If the left tool column is too narrow, we can always hover our mouse over the edge and stretch it to make it wider.
Keep in mind that what we see on the screen will not be the final image that we’ll export when we finish our project. To calibrate the position and the size of the logo we’ll have to go to the View > Camera section. This lets us see the scene from the virtual camera included by default wth every project started in Blender from scratch. To make this process a bit easier, we can move the logo to the center of the scene’s axes by accessing Origin > Origin to Geometry in the menu at the left of the screen. But for non-expert users it will definitely be easier to keep the default camera orientation and increase the size of the object or move it rather than to move the camera to the desired position.
Now comes the moment where we give our logo some volume. To do so, we’ll go to the Data section, which sits among the icons on the same bar as the Object menu that we went to before. Once there, in the Shape sub-section, we’ll click on the 2-D button (3-D will already be ticked), and see how our object “inflates.” Now we’re going to raise it up—that is, based on the vertices of the vector image, we’re going to create a new vertical axis to give it volume.
In the Geometry sub-section we’ll find the tools we need. With Extrude, we’ll calibrate the logo’s height, with Depth we’ll round the corners of the edges, and with Resolution we’ll add greater definition to the finish.
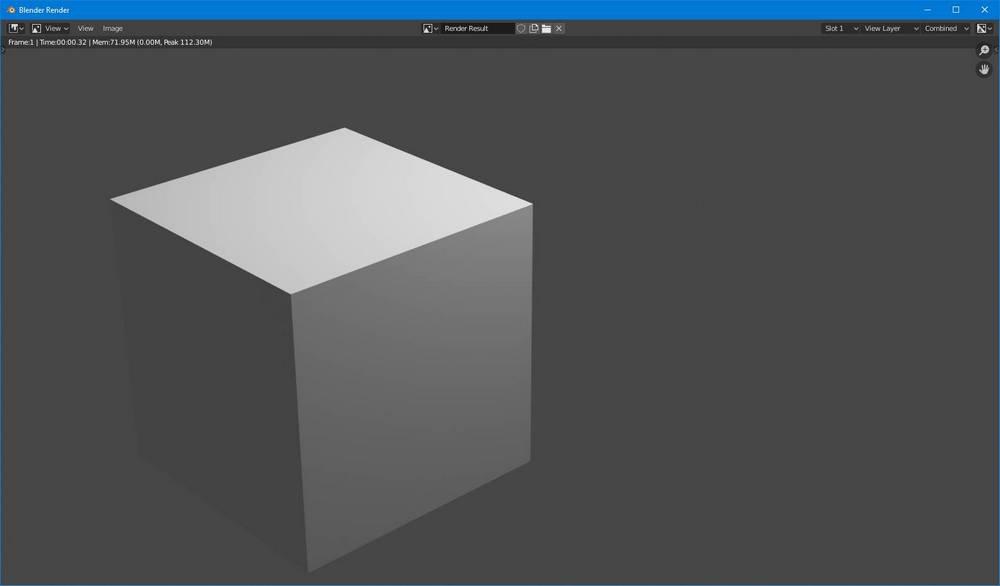
As we make changes, we can check how the final result will come out by pressing F12 to see a renderized image of the project. You can then save that image if desired. To do so, go to Image > Save Image in the window that opens to display the renderized image. To return to the work interface, we just have press Esc.
But we’re not quite there yet, since our 3-D model is still lacking any kind of color or texture, so let’s get to it. In the Material sub-section (represented by a translucent sphere) next to the Object and Data sections that we’ve already used, we can choose our color. To do so, we’ll click “New Material” and a palette of options will pop up for us. In Diffuse and Specular we can refine the project’s colors to give it exactly the look we want.
Finishing touches
The possibilities obviously open up massively as you begin to discover all the different functionalities in Blender, although with this basic tour you can already start to experiment. For example, if your logo is made up of several different parts, you can import them in separate pieces to give each one a unique texture or height, treating each as a different object. Or you can place a background image instead of that sad grey background, add and modify light sources to the scene, and even record a video instead of a static image.
We obviously won’t be able to explain all of these tricks one by one, but Blender has a comprehensive help manual, and if you look online you can find all sorts of tutorials to build on these baby steps into the world of 3-D design. So there you go. Now you have exactly what you need to make the perfect logo!
Blender Beginners Tutorial: How To Create A Solid 3d Object From An Image Using Gimp & Blender


Chipper Videos


In this video I will show you how to create a solid 3d object from an image by first creating an svg image in Gimp image editor, and than converting an svg image to a solid 3d object in Blender. Blender is a professional, free and open-source 3D computer graphics software toolset used for creating animated films, visual effects, art, 3D printed models, interactive 3D applications and video games. Blender’s features include 3D modeling, UV unwrapping, texturing, raster graphics editing, rigging and skinning, fluid and smoke simulation, particle simulation, soft body simulation, sculpting, animating, match moving, camera tracking, rendering, motion graphics, video editing and compositing. It also features an integrated game engine.

Thanks mate it was really useful
That’s just incredible. You’ve demonstrated how jawdroppingly brilliant Blender is.
Thank u so much for the tutorial, Old videos were made in perfect teaching way.
This tutorial is invaluable, this is such a useful skill to learn.
Please do a updated version in blender 2.81A this is so confusing for me.
I have done everything up to QxxnCgIWy3k&t=10m40s 10:40 as I can’t see the Blender Render option in my display.
Any ideas please
Using Gimp v2.10.14 and Blender 2.8.1 This tutorial still works! 👍
If everyone created Gimp videos like you do, Gimp would be easier. Thanks!
This guy is my inspiration
rendered 500 times now desktop looks like a waste paper bin.
Finally somebody who explains this in a manner that a layperson can understand! Thank you so much!
Was not looking forward to building a commonly known object from one of the mesh’s. Thank you for this!
This video solved a file formatting problem that has haunted me for years. Blender does things well that expensive 3D programs won’t do at all. This video helped me solve my file problem on my first day with Blender. Huge thanks to Chipper Videos!
That «Alt+C» command was crucial for converting the object into a model. Thank you, sir, thanks.
Great tutorial on TWO topics in one. First this video provides a great introduction to some basic UI features and techniques for navigating the Blender interface (and a little Gimp). I suffered through a different tutorial earlier as the creator used hotkey after hotkey without even mentioning them. Menu’s just popped up in the video as if from magic without even a breadcrumb trail to follow back. This instructor provides excellent directions even if you’re only starting with Blender.
Second, this is a solid and simple walkthrough to make a 3D object. He could have used an object created in Blender (like a Text object), but by using a Gimp SVG, he really delivers a powerful and reusable technique that feels like a foundational skill for anyone using Blender. Fantastic result.
Graphics Tutorials Using Blender & Gimp
Tutorials Using Blender & Gimp
Blender has been the main tool in my creative arsenal for almost 20 years and having previously written a couple of books to help others learn Blender, I have decided to put my Blenders video and animation knowledge to the test and create a video Blender training course. Hopefully it will help new users and those wanting to learn a little more about Blender get a good understanding of how to use this incredible open source creative package.
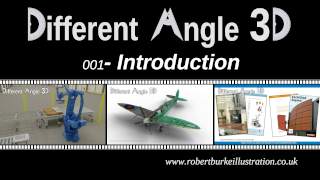
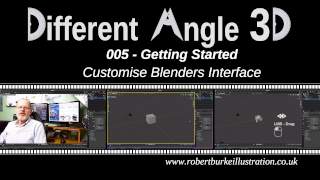
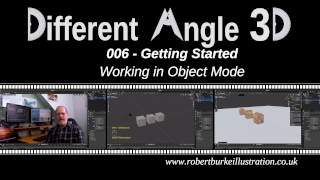
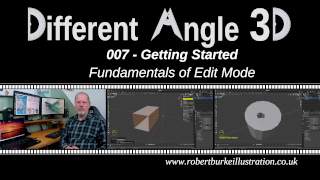
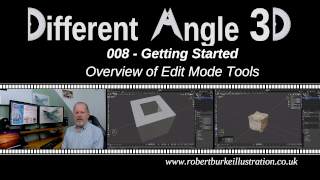
Different Angle 3D
Different Angle 3D is the YouTube Channel where my video are held online. These pages will give you a link to each video together with a timeline of the different sections of each video. The videos build your knowledge as you work through them, so it is advised to watch them in sequence as you may miss key information in later videos if you haven’t seen the previous ones.
Video Tutorials
Web Page Tutorials
Blender Books
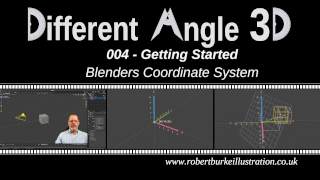
Getting Started
The Different Angle 3D Getting Started section is made up of 8 videos totalling more thn 3.5 hours of video training. It starts with an introduction to the Different Angle 3D series and outlines what I hope to include in these videos, then goes on to walk you through the basic principles of mesh modelling in Blender and Blenders Interface.


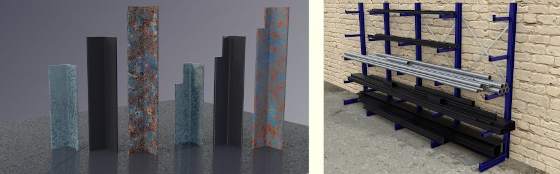
Steel Frames & Fabrications
The Steel Frames & Fabrications section, starts the practical exercises of the tutorials. The section starts with a simple (Dutch) Hay Barn model, where you don’t have to think about accuracy, just keeping proportions right so it represents what a barn would look like in a render or video. This should give any new user an easy introduction to modelling. The section then moves into designing with precision for real world component, showing how Blenders mesh modelling can create dimensionally accurate models which can later be manufactured in a home workshop. In the series, I hope to cover steel fabrications, machined components and models for 3D printing.
Following through the tutorials below will hopefully help you prove your design ideas in 3D before committing to cutting up any real materials.
From the Default Cube to a Barn
If you would like to repeat the tutorial on your own computer, this reference image and other assets can be downloaded from >> Here
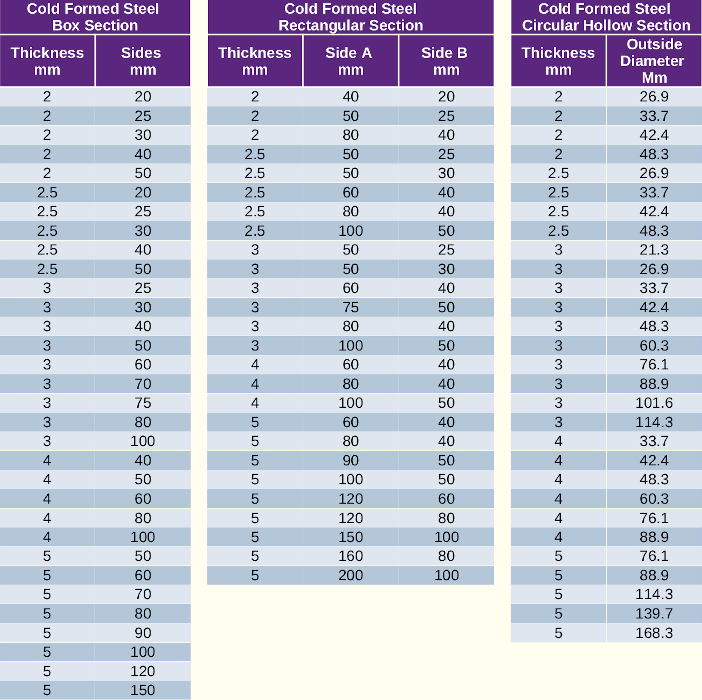
Building a Steel Stock Library
This is the first of the Blender Precision Modelling videos that shows you how to create a mesh model accurately to real world sizes. have chosen this as the first precision modelling tutorial as the different steel sections you create will be used in future videos about modelling steel fabrications.


For anyone who doesn’t want to take the excessive amount of time modelling their own steel stock profiles, I have uploaded mine to my Gumroad page and they are available for a small fee to help cover some of the costs involved in creating the video tutorials and maintaining the website.

The individual steel sections in the library are:

Subscribe to the Different Angle 3D YouTube Channel to get notifications when new videos for
this project are uploaded By clicking >> Here
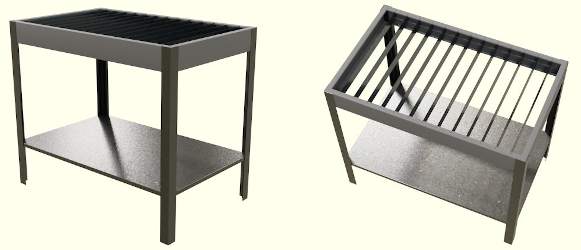
The Plasma Table will be designed to real world units so the finished design can be built from elevation renders taken from the model. The steel sections used in the tutorial will be based on the standard steel profiles created in the previous Steel Stock Library.
The first 2 videos of the Plasma Table project are now online and more will follow soon.


Subscribe to the Different Angle 3D Youtube Channel to get notifications when new videos for
this project are uploaded By clicking >> Here
It has been a long term aim of mine after building an early CNC Router Table back in 2020, to build a new updated one. Back then cheap components such as linear slides etc. weren’t available, so with a very limited budget, the design was based around what scrap metal and cheaper components I could scrape together. Even the electronic stepper controller was designed and built on a wired breadboard.
Now with the availability of cheaper linear guide I am planning a build of a steel frame CNC router with linear guides and a OEM machine spindle rather than a AC Router.
Tutorials will follow as I progress with the CNC router project, but with other commitments and the planned tutorials above, it may be a while before the first of these videos appear. The image below shows the early stage of planning for this project.

Subscribe to the Different Angle 3D Youtube Channel to get notifications when new videos for
this project are uploaded By clicking >> Here
Presision Modelling a 608 Bearing
 This was my first ever Blender tutorial, initially released for Blender 2.4x series of Blender back in April 2004. It was later updated to Blender 2.60 and then in April 2019 updated to Blender 2.80
The tutorial will walk you through the basics of modelling with precision with Blender and introduce you to the most commonly used modelling tools.
Modelling a Realistic Propeller Blade
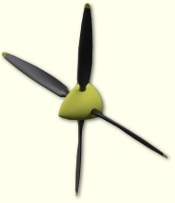 This tutorial was written for Blender 2.70 series. It uses a background image of a propeller blueprint to create a series of sections through a propeller blade which are then skinned to give the propeller profile. The tutorial uses both curves and mesh objects.
The tutorial uses both curves and mesh objects.
Using Hooks to Deform a Curve
 This tutorial was written for Blender 2.63 series. It shows you how to use a Bevel Object on a curve to form a hose. It then takes you through the process of adding Hooks to the curve and parenting the hooks to the end fittings so the hose bends with the fittings when they are moved or animated.
The technique maintains good end tangency of the hose.
Blender Books
3D Computer Graphics Using Blender 2.80 Modelling Methods, Principles & Practice
 Learn to create 3D Computer models using Blender 2.80.
A guide to creating 3D computer models using Blender 2.80. A detailed reference to blenders modelling tools is followed by practical exercises to guide you through a step by step learning process. Working through the book you will create a low-poly house and a detailed Spiral Staircase. Concentrating on modelling principles, the book also introduces you to Blenders Materials, Textures, Lighting, Rendering and Animation.
The details of the book open in my Illustration website.
Blender Precision Modelling Guide
 A Guide to modelling parts and components accurately using Blender.
This book was written in 2007 for the Blender 2.43 and is now outdated.
The guide was created to assist Artists and Engineers, to learn the basics of mesh modelling of non deformable objects with Blender. It uses a structured approach to introducing Blenders tools and work-methods. The guide focused solely on Blenders Mesh Modelling capabilities, it ignored the myriad of animation, texturing and photo-realistic rendering tools and concentrated solely on getting started and producing accurate models suited for both artistic and engineering purposes.
Adventures In Blender >> A review of the Precision Modelling Guide
Now withdrawn, the contents are slowly being recreated in the newer tutorials and books above.
3D печать в Blender: создание подходящей модели
Поделитесь этой страницей с друзьями:
Хотите использовать Blender для 3D печати? Тогда эта статья — для вас. Сегодня мы рассмотрим подготовительные работы и основные принципы создания в Blender моделей, подходящих для 3D печати.

1. Подготовка программы к работе
Настройка масштаба и единиц измерения

Активация нужных дополнений
На протяжении этого урока будут использоваться некоторые специальные дополнения для Blender, поэтому важно заранее их активировать. Для этого откройте окно пользовательских настроек ( Ctrl + Alt + U ) и перейдите на вкладку дополнений ( Addons ). Используйте поисковую строку в верхней левой части окна для поиска нужных дополнений.

2. Полигональное моделирование для 3D печати
Важные советы по созданию пригодных для печати 3D моделей
Когда вы моделируете для 3D печати, есть несколько правил, которым очень желательно следовать, чтобы быть уверенными, что ваша модель будет пригодна к печати. Ниже мы приводим самые важные из этих правил.
Создавайте замкнутую модель
Для понимания концепции замкнутой модели в качестве примера мы использовали приведенную ниже иллюстрацию. 3D модель слева представляет собой не замкнутый объем, а серию незамкнутых поверхностей с нулевой толщиной. Это приведет к проблемам в большинстве программ 3D печати, поскольку они не умеют печатать объекты без заданного объема и толщины. Да и существование физических объектов с нулевой толщиной в реальном мире попросту невозможно. В то же время подобные модели вполне могут существовать в анимации и прочих виртуальных средах, поэтому подобные недостатки встречаются довольно часто.

Избегайте накладывания поверхностей друг на друга.
На иллюстрации ниже вы можете видеть две поверхности, принадлежащие двум разным объемам, но при этом наложенные друг на друга. Это может привести в конфуз многие программы 3D печати. Для избежания проблем необходимо объединить объемы в один и удалить все наложенные друг на друга поверхности. Если модель имеет сложную геометрию, можно использовать для этих целей модификатор булевых операций ( Boolean ).

Сохраняйте общую топологию при минимизации количества полигонов

Избегайте тонких и длинных элементов в модели
Важно понимать физические свойства и технические ограничения материалов, которые используются в 3D принтере. Нужно быть уверенным, что все элементы модели физически смогут быть напечатаны.

Инструменты 3D моделирования
Имеющиеся в Blender инструменты 3D моделирования очень многочисленны и разнообразны. Мы приведем здесь только самые используемые и известные. Перед их использованием не забудьте переключиться в режим редактирования (клавиша Tab ).
Подготовка текста и кривых к 3D печати
Рассмотрим на примере подготовку текста к 3D печати. Для начала, добавьте текстовый объект в пустую сцену.

По дефолту такой текстовый объект представляет собой простую поверхность с нулевой толщиной. Естественно, для печати нам нужно добавить толщину этому объекту. Для этого на панели свойств ( Properties ) на вкладке Text в разделе Geometry введите в поле Extrude ненулевое значение (например, 0.1 ). Увеличивая или уменьшая этот параметр, добейтесь необходимого результата.

Объем добавлен, но буквы по прежнему не соединены между собой, то есть при печати они распадутся на разрозненные объекты. Чтобы этого не произошло, создадим для нашего текста подложку. В примере мы используем для этих целей кривую Безье, но вы можете воспользоваться любым другим вариантом.
Точно так же, как для текста, в разделе Geometry введите желаемое значение в поле Extrude (поэкспериментируйте, пока не достигнете желаемого результата.

После того, как геометрия готова (вы можете еще поиграться с положением по осям, фасками и т.п.), настало время подготовиться к экспорту. Поскольку Blender экспортирует только полигоны, в первую очередь вам нужно конвертировать модель в единый меш. Используйте комбинацию Alt + C для конвертации кривой в меш. Затем то же самое проделайте для текста.

При конвертации в меш могут появиться вершины-дубликаты. Их можно объединить в режиме редактирования. Для этого выделите все вершины ( A ), нажмите Ctrl + V и в появившемся меню выберите удаление дубликатов ( Remove Doubles ). И не забудьте после этого пересчитать нормали всех граней для их ориентации наружу ( Ctrl + N ).

Теперь ваш объект готов к экспорту для 3D печати.
3. Практика использования модификаторов Blender при 3D печати
При правильном использовании модификаторов в Blender они применяются к модели интерактивным и недеструктивным способом. При этом в режиме редактирования вы можете продолжать работать с немодифицированной сеткой. Как всем хорошо известно, модификаторы могут быть добавлены во вкладке Modifiers (с иконкой гаечного ключа) на панели свойств. И сейчас мы разберем некоторые нюансы использования модификаторов при подготовке модели к 3D печати.
Модификатор Mirror (зеркальное отражение)
Этот модификатор используется очень часто для создания симметричных моделей. Однако при его использовании в процессе 3D печати могут возникнуть некоторые проблемы.
Убедитесь, что ось симметрии находится в одной плоскости с центральной петлей модели. Как только вы определились с этой центральной петлей — отметьте чекбокс Clipping в свойствах модификатора (на панели свойств). Это предотвратит пересечение вершинами плоскости симметрии (их «залезание» на «чужую» сторону).
Также хорошей практикой является расположение модификатора отражения на первом месте в стеке модификаторов.


Опять же, при использовании модификатора отражения важно удалить все внутренние грани, появившиеся после применения модификатора. Как уже говорилось ранее, подобные грани могут привести к проблемам при 3D-печати.


Уменьшение количества граней: модификаторы ReMesh и Decimate
Модификатор ReMesh
Модификатор ReMesh перестраивает топологию сетки без модификации реальной геометрии модели. Этот модификатор можно применять к моделям, имеющим избыточное количество граней, либо если грани неоднородны. Такие проблемы часто возникают при импорте моделей из других программ, или при динамическом скульптинге.

Модификатор Decimate

Добавление толщины к поверхности: модификатор Solidify
Модификатор Solidify добавляет к поверхности толщину. Параметр Thickness определяет толщину объекта во внутренних единицах Blender. Это идеальный инструмент для создания пригодных к печати моделей из серии поверхностей.

Отметьте галочкой пункт Even Thickness в настройках модификатора, если ваша модель имеет четко выраженные углы. Этот параметр оптимизирует толщину для всей геометрии вашей модели и позволит избежать хрупких участков.

Прилипание одной геометрии к другой: модификатор Shrinkwrap

Корректировка множественной геометрии и пересечений: модификатор Boolean
Модификатор Boolean позволяет вам производить булевы операции между двумя объектами неразрушающим способом. Этот функционал идеален для создания в моделях различных отверстий, пазов, вырезов и т.п., или для удаления пересекающихся частей двух объектов (что в противном случае может вызвать проблемы при печати).

В примере ниже мы использовали булеву операцию в режиме Union для удаления пересекающихся частей.